


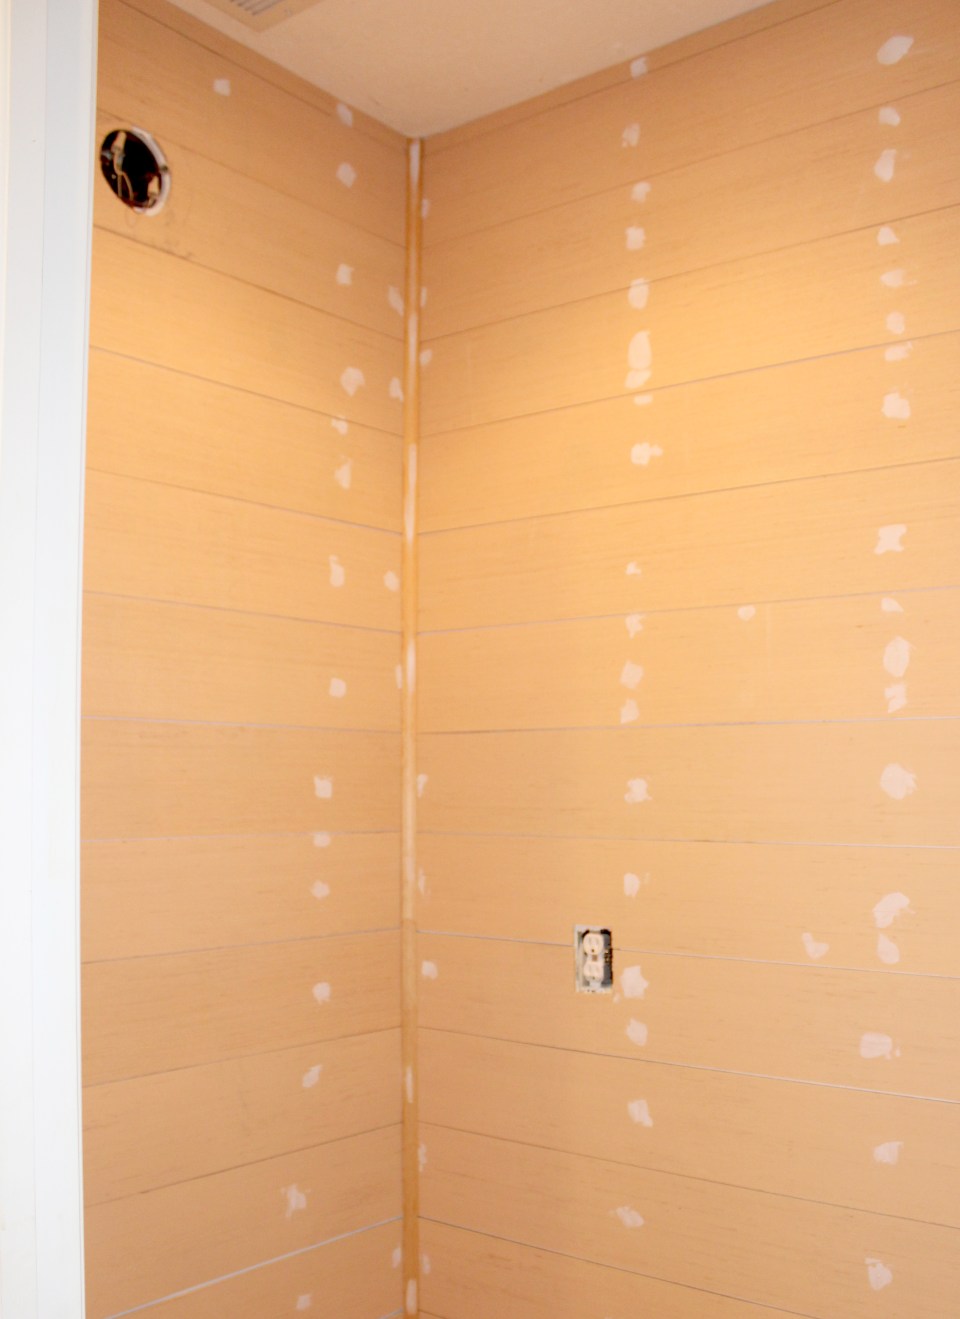
It is with great relief that I finally finished putting up the wood panels in my half bath! And not only are they up on the wall, but they are trimmed, spackled, caulked, and painted. Since there were some angled walls and cuts required, I think that’s where I lost momentum in the past. But I powered through this week.
I’ve recently seen posts debating if the shiplap look is overdone and overrated. I can understand where that point of view is coming from, considering it has been everywhere since Season One of Fixer Upper.
However, I think shiplap works and still looks good, as long as it goes with the style of the home and is not on every single wall throughout the house. I wouldn’t necessarily define my style as farmhouse, although there are some elements to that look I like. But wood planked walls can be an excellent way to add some understated dimension to a space. In a small room like my half bath, it seemed like a good solution to add depth without overpowering it.
(Affiliate links included below)
Tools I used for this project:
- Circular saw
- Kreg circular saw guide
- Miter saw
- Brad Nailer
- Jigsaw
- Level
- Stud finder
- Caulk gun
- Spackle knife
Materials I used for this project:
- Plywood (I used thin plywood primed on one side)
- 1-inch brad nails
- Corner molding
- Spackle
- Caulk
- Paint (I used Sherwin Williams Pure White, which is the color of the trim throughout my house)
Plankin’ it up
I started by cutting the plywood into 6-inch strips with my circular saw and Kreg circular saw guide for an accurate cut. From there, I nailed it on the wall with my brad nailer from the bottom up using 1-inch brad nails into the studs and making sure it was level as I went. I did not glue the planks on the wall, but that is probably an extra step you could take. I may not want this up on the wall forever, so I didn’t want to ruin the drywall if I ever want to take it down.

I used pennies as spacers between each row of planks, and a jigsaw to cut holes in the planks as needed for things like electrical outlets, light switches, and plumbing. Since the bathroom is under the stairs and part of the wall is angled, I measured and cut those planks at a 50-degree angle.

I didn’t worry about getting everything perfect on the corners, because I knew I was going to get some corner molding to put in those spaces to make the room look a little more finished. If I really thought through this, I would have planned out a way so that the planks evenly reached the ceiling, but I ended up needing to cut a thinner strip at the top. I don’t mind the way it looks, though.
At this point, I stopped and admired the walls for far too long because I was so excited to finally have all the boards up!


Then I spent time spackling every nail hole before painting. This was a bit tedious but definitely worth it.
Then, it was time to paint! This is when I really felt like the walls were coming together the way I wanted. For the last step, I caulked along the corners and edges. If I did it again, I would probably paint the boards before I put them up because I had some issues with paint getting in between them and messing up my lines a bit. I’m still thrilled with the way things turned out!


One Room Challenge
I still have a lot to get done to finish up this room, but I’m feeling positive so far.
To look at what rooms the other participants are working on, click the logo below.

Check out my other posts for this challenge:


OMG…you are one talented gal Kristen. Love everything you have done and inspire me to do this in my bathroom. Love shiplap myself!
Thank you so much! I’m glad you like it 🙂
Love this!! What sheen of paint did you use on the boards?
Thank you so much! I used a matte sheen in Sherwin Williams Emerald brand paint in Pure White.
[…] Half Bath Planked Walls […]
[…] 3: Half Bath Planked Walls […]